Circular End Table Top
This circular top is made from 1 1/2" thick oak wedges and three strips of 1/4" thick walnut. The walnut strips separate the top into thirds for a unique appearance

Project Planning
Draw the layout on paper using a stick with a centre nail and three other holes for a pencil. I drew three different diameters before deciding on the final size. Then divide the circle in thirds and layout the 1/4" wide walnut locations.
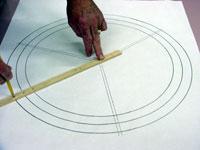
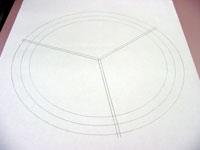
My next operation was to taper one end of each walnut strip for a nice joint at the centre. Cut the strips longer than necessary as they will be trimmed off later with the router. (Here is an option to consider when building the top. The center fit can be difficult so to make things a whole lot easier, don't even worry about the fit of the walnut and oak wedges at the centre. We will cover the centre later with a circular walnut inlay. It serves two purposes 1) covers up our joinery and 2) adds to the appearance. Perfect!
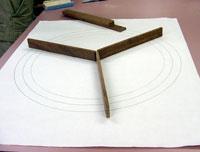
The oak wedges fit between the walnut strips. The width and length of the strips will depend on what size of oak you happen to have in your left-over bin.
Plane all the oak to 1 1/2" thick before cutting to size. In the end I used 3" x 9 1/2" pieces to cut into wedges.
Cutting The Wedges
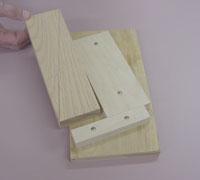
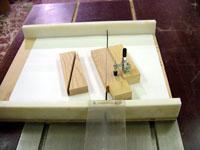
Make a holding jig to cut the oak into equal wedges. I screwed this jig to a sliding table used on the table saw. The clamp holds one wedge in place as the saw cuts the oak blocks from corner to corner.

Gluing The Top
I used an air nailer to attach the walnut strip to the first wedge. When fitting the wedges I again air-nailed near the centre where the stripes narrowed. However, near the outside I used a pocket jig to attach the pieces from the underside. The final wedge in each 1/3 section will need to be jointed to fit properly.
HINT: Using the pocket jig caused stress on the underside which resulted in cupping during the drying process. In fact, I still had to do some touch ups after it was put through the thickness sander. A better method would have been to attach the top to a scrap piece of plywood and wedge the pieces together one at a time thus eliminating end stress.
Cutting The Top
Determine the exact diameter of your top after it has been sanded smooth and flat. Cut excess length of pieces on the bandsaw before proceeding.
Set the radius by marking the distance from the edge of the bit to a point on the circle jig. Drill a small hole in the jig for the pivot nail. I used a 3/8" spiral bit and made two passes when cutting the top to size.
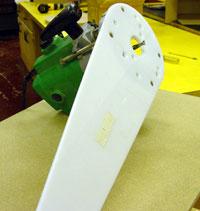
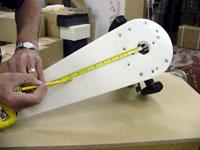
Double stick tape the face side of the top to a scrap piece of plywood. Attach the circle jig to the centre of the top. Set the depth to roughly half the thickness of the top.
Start the router and move in a counter-clockwise direction and plunge into the wood. After the first pass, stop the router and change the depth of cut. Make one more pass and the top is cut to size. The edge will be moulded just prior to installation to the pedestal.
